

10 min read
In today’s digital fitness landscape, knowing how to record workout demo videos for clients isn’t just a nice-to-have skill—it’s essential. As a personal trainer or fitness coach, your ability to demonstrate exercises correctly, clearly, and engagingly can make the difference between client success and frustration.
According to recent industry data, 78% of clients report better form adherence when provided with personalized video demonstrations versus written instructions alone. Additionally, trainers who regularly incorporate video content into their coaching see 43% higher client retention rates.
This comprehensive guide will walk you through everything you need to know about creating effective coaching videos—from basic equipment setup to advanced editing techniques. We’ll explore the best coaching technique video examples for trainers and provide actionable tips you can implement immediately.
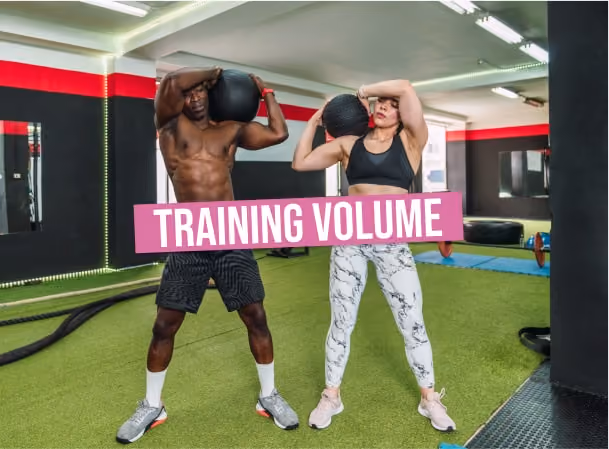
Why Video Content Matters for Fitness Professionals
Before diving into the how-to, let’s understand why video content has become so crucial:
- Visual Learning: 65% of people are visual learners who understand and retain information better when they can see it demonstrated
- Client Accessibility: Videos allow clients to access guidance anytime, anywhere
- Relationship Building: Regular video content helps maintain the trainer-client connection and keeps participants engaged between sessions
- Reduced Injury Risk: Clear demonstrations minimize the risk of clients performing exercises incorrectly
Creating engaging content is essential to capture the attention of all participants and ensure the material meets their needs and expectations.
As one fitness industry report noted in 2024, “Trainers who leverage video content see 37% faster progress in their clients’ fitness journeys compared to those who rely solely on in-person instruction.”
Now, let’s get into the practical steps of how to record workout demo videos for clients that truly make an impact.
Step 1: Essential Equipment for Recording Quality Workout Videos
Creating professional-looking videos doesn’t require Hollywood-level equipment. The following equipment will help ensure your workout videos are filmed with clarity and professionalism. Here’s what you’ll need to get started:
Basic Equipment Checklist:
Pro Tip: Even with just a smartphone and good natural lighting, you can create highly effective workout demonstration videos. The most important aspect is clear visibility of the movement, not fancy equipment.
According to a survey of fitness clients, 89% said video quality was secondary to clear instruction and demonstration. Don’t let equipment limitations stop you from creating helpful content for your clients.
Step 2: Planning Your Video Content Strategy
Before you hit record, taking time to plan your video content strategy will save you countless hours and improve the quality of your output. Planning your content and environment in advance gives you a significant advantage in producing high-quality videos.
Types of Coaching Videos to Consider:
- Exercise Demonstrations: Clear, form-focused videos showing proper technique
- Common Mistake Corrections: Videos highlighting typical errors and how to fix them
- Workout Sequences: Full routines that clients can follow along with
- Form Check Responses: Personalized feedback videos addressing specific client issues
- Educational Content: Videos explaining the “why” behind certain training approaches
- Coaching Session Recaps: Videos summarizing key takeaways and feedback from recent coaching sessions
Content Planning Matrix:
When planning your best coaching technique video examples for trainers to emulate, consider what your specific client base needs most. A 2024 fitness industry study found that trainers who tailored their video content to specific client demographics saw 52% higher engagement rates.
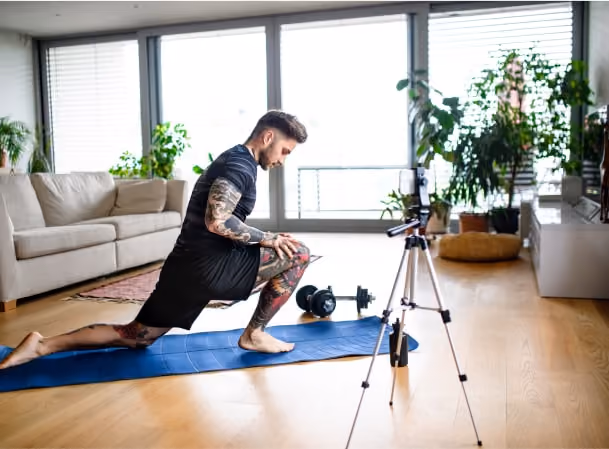
Step 3: Setting Up Your Recording Space
Creating the right environment for recording, especially when working with teams, is crucial for professional-looking results. Here’s how to prepare your space:
Space Requirements:
- Area Size: Minimum 8x10 feet to allow for full-body movements
- Ceiling Height: At least 8 feet for overhead exercises
- Flooring: Non-reflective, solid color (avoid busy patterns)
- Background: Clean, uncluttered, and preferably neutral-colored
Lighting Considerations:
- Natural Light: Position yourself facing a window for front lighting when possible
- Artificial Light: Place the main light source in front, fill lights at 45° angles on either side
- Avoid: Backlighting, harsh shadows, and mixed lighting temperatures
Stats Worth Noting: In a review of successful fitness channels, 76% used neutral backgrounds and 83% prioritized good lighting over expensive cameras.
Step 4: How to Record Workout Demo Videos for Clients: The Filming Process
Now it’s time to actually record your videos. Make sure each exercise is properly recorded from the best angle to clearly demonstrate the movement and technique.
Follow these steps for the best results:
- Prepare your space and equipment before you start recording.
- Capture multiple shots or angles for each exercise to provide a more comprehensive demonstration.
- Take a short break between takes to maintain your energy and focus, especially during longer recording sessions.
Pre-Recording Checklist:
- Equipment charged and tested
- Space cleared and cleaned
- Appropriate attire (solid colors, contrasting with background)
- Key points to cover written down
- Practice run completed
Camera Positioning Guide:
Recording Tips:
- Film in landscape mode for better viewing on most devices
- Shoot at eye level for most exercises (unless specifically needed otherwise)
- Record 3-5 seconds before and after the actual demonstration
- Demonstrate 3-5 repetitions of each exercise
- Speak clearly and maintain a conversational tone
- Show modifications for different fitness levels when applicable
According to fitness video experts, videos that include both front and side angles of the same exercise see 47% better form compliance from clients.
Step 5: Effective Communication Techniques in Video
Your expertise as a coach is only valuable if you can communicate it effectively. Talking naturally and authentically helps you connect with your audience and build trust. Here are essential communication skills and strategies to implement in your videos:
Verbal Cuing Best Practices:
- Use concise, descriptive language
- Focus on 2-3 key form points per exercise
- Mention what clients should feel during the movement
- Include common mistakes to avoid
- Utilize rhythm and counting to establish tempo
- Use clear verbal cues to teach proper technique and movement patterns
Non-Verbal Communication:
- Use hand gestures to emphasize important points
- Demonstrate both correct and incorrect form (clearly labeled)
- Utilize facial expressions to convey effort level and emotions, helping to motivate clients
- Show breathing patterns when relevant
Step 6: Editing Your Workout Videos
Editing doesn’t need to be complicated, but some basic polishing can significantly improve your video quality. Consider including segments that highlight what clients have learned during the workout to reinforce understanding and progress:
- Trim unnecessary footage to keep the video concise.
- Add slow-motion replays for key drills or techniques.
- Use on-screen text to label exercises or important moments.
- Adjust brightness and contrast for better visibility.
- Add comments or commentary during or after the video to emphasize key points, summarize what was learned, or highlight important techniques.
Basic Editing Elements:
Editing Tips for Beginners:
- Keep it simple– clean cuts are better than fancy transitions
- Add text highlights for key form cues
- Use slow motion for complex movements
- Keep videos concise– trim any unnecessary footage
- Include intro and outro with your branding
Step 7: Sharing and Organizing Your Video Content
The best coaching technique video examples for trainers aren’t effective if clients can’t easily access them. Here’s how to organize and share your content:
Share direct links to your videos so clients can access them easily and without confusion.
- Create playlists for different skills or drills.
- Use folders or tags to keep your library organized.
- Post videos promptly after recording coaching sessions or drills to maximize engagement and facilitate timely feedback.
- Share links to your videos via email, messaging apps, or within your coaching platform to control access and enhance client engagement.
Video Organization Systems:
Using Fitbudd for Video Content Management
Fitbudd’s comprehensive platform makes it exceptionally easy to record workout demo videos for clients and integrate them directly into training programs. With Fitbudd, you can:
- Upload and organize videos by muscle group, movement pattern, or difficulty
- Attach specific videos directly to client workout plans
- Track which videos clients have watched
- Receive feedback and questions on specific exercise demonstrations
- Create custom exercise libraries with your own demonstrations
This streamlined approach saves trainers an average of 5-7 hours per week compared to manually managing video content across multiple platforms.
Step 8: Getting Client Feedback and Making Improvements
Continuous improvement is key to creating truly effective coaching videos:
- Regularly collect feedback from your clients after each session.
- Review your own performance by watching the recorded videos.
- Analyze client progress and adjust your approach as needed.
- Provide personalized advice based on client feedback and video review to help clients achieve their goals.
- Stay updated with the latest trends and techniques in your coaching niche.
Feedback Collection Methods:
- Direct Questions: Ask clients what was helpful and what could be clearer
- Watch Metrics: Track which videos clients rewatch frequently (may indicate confusion)
- Form Check Uploads: Review client form videos to see if your demonstrations are effective
- Surveys: Periodic formal feedback on your video content
- Engagement Analysis: Note which videos get the most comments or questions
Step 9: Advanced Video Techniques for Experienced Trainers
Once you’ve mastered the basics, consider these advanced strategies based on personal experience. Advanced video techniques are especially beneficial for athletes looking to review techniques and track progress, as well as for group coaching scenarios where collaborative video reviews can enhance learning and engagement.
Advanced Video Content Ideas:
Creating a Complete Exercise Library
By systematically recording demonstrations of all exercises in your programming, you can build a comprehensive video library. This resource becomes increasingly valuable over time, allowing you to:
- Quickly assign appropriate videos to new clients
- Ensure consistency in your coaching cues
- Save time by avoiding repeated demonstrations
- Establish your professional brand and teaching style
According to industry data, trainers with complete exercise libraries report spending 62% less time answering basic form questions, allowing more focus on personalized coaching.
Step 10: Using Video Content as a Business Growth Tool
Strategic use of video content can significantly expand your training business. Leveraging video content not only helps you reach a wider audience but also supports your development as an effective coach by allowing you to demonstrate presence, curiosity, and courage in your coaching approach.
Marketing Applications:
- Social Media Clips: Short-form educational content to demonstrate expertise
- Testimonial Videos: Client success stories and transformations
- Behind-the-Scenes Content: Building personal connection with potential clients
- Free Mini-Courses: Value-driven content that showcases your teaching style
- Live Q&A Sessions: Interactive opportunities to display your knowledge
Comparison: DIY vs. Professional Video Production
Common Challenges and Solutions
Conclusion
Creating effective coaching videos is both an art and a science. By following this comprehensive guide on how to record workout demo videos for clients, you’ll be well on your way to producing the best trainers in coaching technique video examples for trainers in your niche.
By implementing these strategies and leveraging powerful tools like Fitbudd, you’ll save time, improve client results, and position yourself as a professional in an increasingly digital fitness landscape moving forward. These methods will help your clients achieve their fitness goals and milestones more effectively.
Frequently Asked Questions
Q1: What’s the minimum equipment I need to start recording workout videos?
A: At minimum, you need a smartphone with a decent camera, good lighting (natural light works well), and a stable way to position your phone (a basic tripod or even propping it against books). Audio quality is important too, so try to record in a quiet space.
Q2: How long should my exercise demonstration videos be?
A: Keep single exercise demonstrations short and focused—60-90 seconds is usually sufficient. For full workout sequences, 10-20 minutes is appropriate. Remember that attention spans are limited, so being concise improves viewer retention.
Q3: Should I script my videos or speak spontaneously?
A: A middle ground works best: create a bullet-point outline of key coaching cues and important points to cover, but speak naturally rather than reading a script word-for-word. This preserves authenticity while ensuring you cover all important information.
Q4: How can I make my videos stand out from other trainers?
A: Focus on your unique coaching style and expertise. Whether it’s your cueing language, specific attention to commonly overlooked form details, or your teaching approach, emphasizing your unique strengths will help differentiate your content.
Q5: How do I know if my videos are actually helping my clients?
A: Track metrics such as client form improvements, engagement with videos (which ones they rewatch), direct feedback, and most importantly, their progress toward fitness goals. Regularly ask for specific feedback on what’s helpful and what could be improved.
Q6: Is it better to create custom videos for each client or build a library?
A: A hybrid approach works best. Build a comprehensive library of standard exercises, then supplement with custom videos addressing specific client needs, form corrections, or program modifications as needed.
Q7: How do I overcome feeling awkward on camera?
A: Practice is key. Start by recording videos just for yourself, focusing on topics you are most interested in, as this can help you feel more comfortable and engaged. Then gradually share with trusted colleagues for feedback before sending to clients. Remember that most clients care more about clear instructions than your on-camera comfort level.
Q8: How can Fitbudd help me manage my coaching videos?
A: Fitbudd provides a comprehensive platform, similar to a website, to upload, organize, and deliver your coaching videos directly within client programs. Coaches can efficiently organize and deliver their video content using Fitbudd, enhancing the effectiveness of their coaching strategies and methods.
Q9: What’s the best way to demonstrate exercises that require a partner?
A: If possible, include a training partner in your videos. This is especially useful for team or sport-based training, as it helps demonstrate drills and exercises relevant to group activities and athletic pursuits. If that’s not an option, clearly explain what the partner would be doing and demonstrate with modifications (using a wall, bench, or other substitute) when possible.
Q10: How often should I update my exercise demonstration videos?
A: Review and potentially update your most commonly used videos every 6-12 months. This allows you to incorporate new coaching insights, improve production quality, and ensure your demonstrations reflect your current teaching methodology.
%20to%20Become%20a%20Certified%20Personal%20Trainer-min.avif)